Showing posts with label General D'Armee. Show all posts

Thursday, February 11, 2021

Basing 28mm Napoleonic Figures


Recently I have been asked how I base up my rank-n-file 28mm Napoleonic figures, so instead of repeating myself the below is our groups basing scheme for rank and file napoleonics. About a decade ago, my gaming group came to a conesus for the below basing system and we have been using it since our heavy Black Powder gaming days. We now game General d'Armee and the basing has remained the same. The "system" was a compromise on aesthetics, cost and legacy basing for game systems like General de Brigade. For the most part we are all still pleased with the results this standard has given us, though I've noted a couple of alternative ideas that I might have used knowing what I know now! All the bases I use are from Litko and are the 3mm thick and at the end of the post, I summarize the bases used and the Litko code for each of them.

Infantry Battalion - 40mm Square Base
Each infantry battalion is comprised of twenty four figures, with four figures on each of the six 40mm square bases. I tend to have one command base with the flag(s), two "elite" company bases and three center company bases for almost all nations.


Alternate Basing - It can be time consuming moving six bases and if I had to do it again I might be open to using four bases of six figures instead. You can show most formations normally and it is slightly quickier moving four bases ithan six.

Cavalry Regiment - 50mm x 60mm Rectangle Base
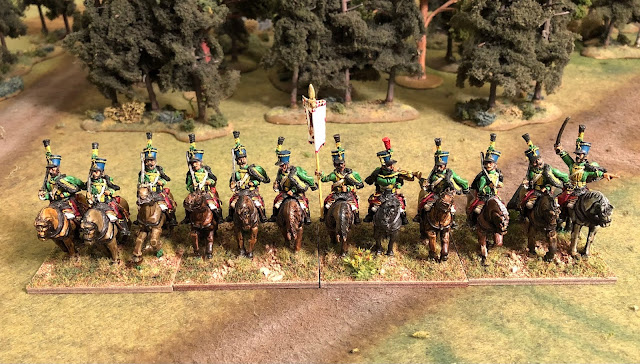
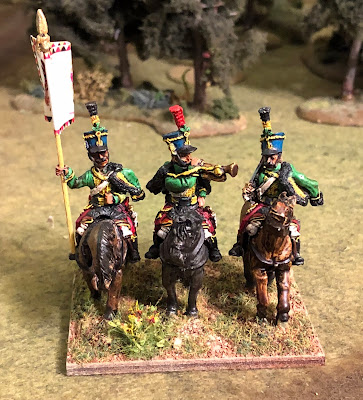
We use twelve figures for each cavalry regiment, with three figures on each of the four 50mm deep by 60mm wide bases. It can be a tight squeeze sometimes but I have not had to adjust the base size to fit a brand of figures yet.


Artillery Battery - 60mm by 80mm Rectangle Base
An artillery battery is comprised of two gun models and eight to ten figures on three bases, one of which is a spacer base in between the two gun bases. A single gun and four crew are attached to a 60mm wide by 80mm deep base. For the spacer base, we use zero to three figures, extra equipment and large scenic items added to the same sized base, and is used to increase the width of a deployed battery.


Alternate Basing - well not really alternate base, but I have been thinking about making a left and right gun base and tighten each gun to the appropriate side, perhaps even moving a figure or two from the gun base to the spacer base. The idea is to get the guns a little closer together and add space to the "outside" of each battery. I might try this on the next battery I paint up.

Skirmish Screen - 30mm x 60mm Rectangle Base.
For brigade skirmish screens of two to nine bases, we use two figures on a 30mm deep by 60mm wide base. We also substitute four infantry bases with an equal number of skirmish screen bases to indicated that a light battalion has deployed into skirmish formation.


Alternate Basing - instead of a rectangle base I think I'd base my skirmishers on an oval base. I'd most likely use 35mm by 60mm oval bases (GMB731). The rectangle base seems to "orderly" for skirmishers and an oval base would look more "natural" when bending the skirmish line.

Brigade Leader - 60mm Round base.
Most brigadiers are represented by one mounted figure on a 60mm round base.


Division Leader - 3" Round Base
Divisional or higher level leaders typically have two or more figures on a 3" round base.


Casualties and Disorder Markers
To show if a unit is Disorder we use "wounded" figures mounted on 25mm or 30mm round bases. To mark casualties suffered during the games, we use a 40mm square with a dead figure or horse, with each side being marked from 1 to 4 to show the number of "hits" the unit has suffered.


Alternate Basing - Some of the guys have been using the micro dice holders on the causality bases. They typically use a double d6 "tray" so as to mark 1 to 12 hits per unit. I myself am not super keen on the dice, and have been thinking about making hit markers as above with out the figure and double sided and making a smaller 2nd set to mark hits 9 to 16. I'd also color code the hits number to show the effects of losses for General d'Armee.

Base Summery - Litko 3mm Wood Bases.
Below is the list of bases I use from Litko.

Type

Size

Litko Part #

Infantry

40mm x 40mm

GMB061

Cavalry

50mm x 60mm

GMB497

Artillery

60mm x 80mm

GMB081

Skirmish

30mm x 60mm

GMB073

Brigade Leader

60mm Round

GMB245

Division Leader

3” Round

GMB605


I hope some of you found this helpful.

Friday, November 10, 2017

Napoleonic Buildings - Plancenoit, Part Three

Finished! Well as done as I going to get them at this point :)
Northern Plancenoit - five BUA's sectors.
I won't be doing as many walls and hedges as planned, as the area to fit the troops in is already small and I don't necessarily need an entirely walled village. Fields and brush will be placed around the perimeter to break up the lines created by the built up areas.

Overall the village came out pretty well; though the "whole" looks a lot better than the individual buildings. But for what it is going to be used for, it is well past good enough!
The hedge at the end can be removed for another road opening.
Each BUA area is roughly a 9" square and I spray painted the road, dirt and grass areas on to a piece of felt. I'll most likely reverse the felt and spray a different pattern so that we can vary the village.
Time was the issue, so no door on the "city" gate. I can easily also one in at any point.
But thought the village needed a restricted entry/exit as well as an end cap. 

At the last minute I changed one of my buildings to a small church and went 'fancy' by adding color printouts to represent stained glass. It came out alright, but I think I need to figure out how to add a window frame.
The walled church area can be used for a particular difficult area to fight over.

When using the plastic stone facings, I need to be more precise with the cuts and do a better job of hiding the joins.

Need to frame that stained glass!
Most of the other buildings went as planned, though did add an inner gatehouse at the last minute.
Hard to see, but the Inner Gate is directly in the back.
As with all my projects, there are a things I would do differently. First and foremost is to make many of the buildings taller to give them illusion of being a 28mm building. As it is, several of the buildings would work well in a 15mm game :)
Some of the buildings are very small, the worst offender is seen above in the center.
I also used a homemade wash (really just gloried dirty water!), and not sure I like the look. Though I am warming up to it the more I put other terrain on the table. I suppose I should also do a better job of mixing the "ingredients" and perhaps add more brown to it to warm up the color some.
The wash used for the wall and buildings was different ... I tried to dry brush the walls to better match the buildings
The stone wall was much easier to do up than I thought, but next time I will spend more time blending the top and sides together. Kind of expensive using all that plastic, but thought I needed one BUA sector that could represent a fortified area. I had plans to do a wrought iron gate, but just felt it was not worth the time at this point, and I can always add it in later.
The gap is noticeable on the right side wall.
I watched a video by a "railroad guy" on how to do up hedges, and so set out to copy him. Turned out to be a very quick and easy way to turn those blue scrubbing pads into trimmed hedges! I am also thinking about making a gate section as well. Right now they are all unbased which means I'd need to sink the connecting popsicle stick into the bottom of the hedge, very doable just hard on the scissors :)
First layer drying ... then the bright stuff will be added.

Hedges complete, some bright green to make them pop on the gaming table.

The hedges are about 1" high and fit well with the 28mm figures.

I had issues with the new spackling I used. It seems that I was not paying attention and bought a different brand. Many of the buildings sides were much "smoother" than planned. It was also 'wetter' and so may not add as much water and paint next time.
The spackling turned out much smoother so I might add some sand next time.
I got tricky with the last BUA wall section. Instead of two corner sections I combined them with a small strip of cardstock. Pretty flimsy but the building notch in really well.
Notched out a section to fit the back building in between two wall sections.

Again think the village will work very well for our General d'Armee games, and we should have enough BUA's for most games were running now.

Back to miniatures for next project ... another unit of Russian Infantry in greatcoats.

Wednesday, October 4, 2017

Napoleonic Buildings - Plancenoit, Part Two

While waiting for the next unit of Russian Infantry in Greatcoats to show up, I thought I scratch out a few more buildings for the Plancenoit Village, well really for any Napoleonic game.

I thought it best to sketch out the town layout including walls/hedges, trees and the cobblestone road. I settled on five sections laid out in a cross pattern. Once I had a rough idea, I started on the nine remaining buildings.

 I roughed out all the buildings like this one before going onto the windows, doors and roof.

Once I have all the buildings to this stage, I'll get out my spackle for the sides of the building and to cover up any mistakes.

 Almost done with all the buildings, I start getting "crafty" at this point to make each building unique. I'll do more walls as well and then start on a few simple hedges.

It kind of gets messy but I like to wait before tossing the scraps, as I almost always need some of it to fix mistakes.

I keep a base on hand to test the height's and make sure they do not dwarf my "tall" 20mm buildings.

Here is an example of a "crafty" building, I was just going to have a short and tall rowhouse building next to each other. Then decided to turn it into a gate house next to a building. I have only attached it to the smaller building as I think I can also use it next to a wall section for a gate. This way I can have it face to the outside or the inside of the village/town.

I'll update the status of the project once I start spackling the buildings.

Tuesday, September 26, 2017

Napoleonic Russian Infantry in Greatcoat

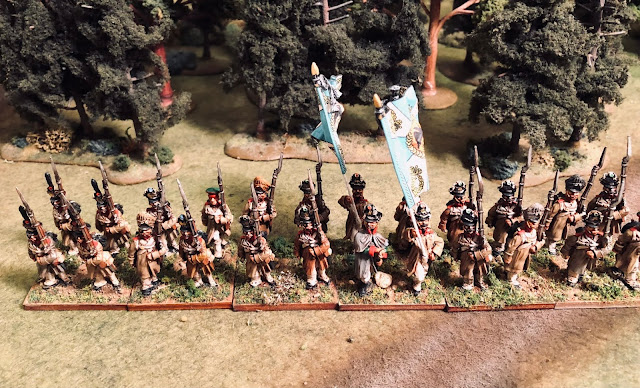
After finishing the massive East German force, I thought I'd get back to "normal" painting. This translate into 28mm Napoleonics and as I had some Russian in greatcoats lying around from Elite Miniatures, so that is what hit the painting table last week.
Russian Infantry Battalion in Greatcoats
As I plan on at least three more of these units, I was looking for a simple paint scheme for an already simple model to paint. I found a can of sandish spray paint that I thought when inked would look good as the color for a russian great coat.
My Test Subjects
As I am want to do, I normally paint one or two figures up to get a feel for the paint scheme and if it needs any changes. In this case I painted up four figures as that is how I had mounted them.
Then I start blocking out the figures, though after some reading and internet searches I decided to vary up the color of the greatcoats by adding in some greyish and red brown coats.

Not much to the block painting and after only two one hour paint sessions I had all the figures blocked out. Then I washed the figure in a mix of Army Painter soft and strong tone, though on the pants and face I went with just straight soft tone.

Adding my three levels of rocks
Letting the wash dry over the weekend (well Sunday in my case) I then glued the figures four to a base and set about basing them up. Most of the time I hit the sides of the bases with a brown color to hid the paint chips after removing them from the painting strips of cardboard.

I use three types of rocks on each base, then a flocking mix over 70-80% of the base. Finally I add in some tufts and clump foliage to the bases.

Flocking mix added to bases.

To the right is my container of clump foliage scraps that I use for basing.

 Then I hit the models with clear coat to dull them up and "glue" down any loose flocking.
Battalion Line

Column of Companies

Still need to add two flags to it, but i don't have any right now and I'd like to do all four battalions at once.

The figures are decent figures except for the shako's ... those really need to be redone, it is hard to paint the cords and not sure about the front of the shako. I think it is supposed to be the eagle but even with magnifying glasses I could not make heads or tails on it so just dabbed some gold around the area.


Thursday, June 22, 2017

Napoleonic Buildings - Plancenoit

Ken and I have been floating the idea of doing the Prussian attack at Waterloo in 28mm. This got me thinking on what terrain we would need. The village of Plancenoit should be the main focus of the game so started thinking about how to represent it on the gaming table. My initial thinking is that we'll need about ten 9"x9" BUA's, or about five feet of village.

I am pretty sure I will be using "tall" 20mm bldgs, as I think we need lots of buildings to get the "village look" but still have space to put bases in each sector. I already have a couple of 20mm resin buildings and plan on using them as templates to create up about 15-20 buildings.

I created up a test building, and while it took a little longer to make than I thought, I think it turned out pretty good, or at least good enough when put next to 15 other buildings, walls and trees.


The Original
I'll most likely need to do something different for the roofs ... too costly for essentially "throw away" buildings. I am leaning towards just drawing them in, though might cut strips and stack them up for the roof tiles.
The Front
Using the grid paper really made making the windows and doors easy ...
The Back
I added some coffee sticks and brick to the sides, then applied spackle. I'll thin out the spackle even more on the next batch of buildings. I might add more features on a few select buildings but am thinking I'll build most of them like this. Sanded down the spackle, and primed the building.

Once the primer was dry, I rough out the colors for the roof, building sides and brick work.

Then brightened up the colors with heavy dry brush.

 Painted in few details, such as the windows and different colored bricks.

Walla! One down fourteen more to go :)

Most of them won't be this big, I'll do about eight single level buildings and half a dozen smaller two story buildings.

Edit: Looking at the map and deployments of the French and Prussians I may rotate the village and just have the top half or two thirds of it on the table. This would cut down on the number of buildings needed