Monday, May 25, 2015

Battle of La Rothier February 1814

We had a great game of Black Powder last Saturday. Bill, Bob, Gary, Steve and I fought out the 1814 scenario I had created and here is the background on it:

Northern section of the battle where Grand Duke von Wrede Austro-Bavarian V Corps attacked Napoleon's flank at La Rothiere. Marmont's weak corps attempted to cover the front between Chaumesnil and Morvilliers.

The scenario was a “what if” Marmont did not fallback and held on to Chaumesnil. This set up having the Young Guard attack V corps around Beauvoir Farm instead retaking Chaumesnil.

Marmont's French Corps

Commanded by Bob
Infantry Division - GdD Lagrange [Ld7]
Brigade – GdB Joubert [Ld7]
  8x Small Infantry Bns 

Commanded By Bill
Cavalry Division - GdD Doumerc [Ld7]
  1x Hussar & 3 small Chasseurs Rgts &
  2x 6lb Batteries

Cavalry Division - GdD l'Heritier [Ld7]
Brigade - GdB Lamotte [Ld7]
  3x small Dragoon Rgts

Brigade - GdB Collaert [Ld8]
 2x Small Dragoon Rgts 

Commanded By Gary
2nd Voltigeur Division - GdD Decouz [Ld9]
  4x Young Guard Bns, 2x 6lb Batteries


Austrian-Bavarian V Corps

Commanded By Steve

Bavarian Infantry Division - GdD Rechberg [Ld8]
2x 6lb batteries

Brigade GdB Bayern [Ld7]
  3x small Chevaulegeres rgts

Brigade GdB Prinz Karl [Ld7]
  1x light, 1x infantry & 1x militia Bn

Brigade GdB Maillot [Ld7]
  1x light, 2x infantry & 2x militia Bns 

Commanded By John
Austrian Division - FL Splenyi [Ld7]
Brigade Volkmannn [Ld7]
  6x infantry Bns & 1x 6lb Battery

Brigade Minutilly [Ld8]
  1x hussar, 1x dragoon rgts & 1x 6lb battery

GdD Lagrange and GdD Doumerc troops began the battle on the table, while the rest of the units for both sides would move on to the battlefield throughout the game. See map above for various entry points for arriving troops.
The first couple of turns went as expected, four of the five allied brigades slowly moved onto the battlefield and a few rounds on long range cannon fire from the French ensued. 
Most of the Bavarian forced moved to the left, to assault the French battalions holding the hill. 
This meant that the Austrians were needed to take the farm, so the three battalions of the German regiment veered left and attacked uphill against the French holding the farm.
The three battalions of the Hungarian regiment and the cavalry brigade would hold off the massed French cavalry. The Hussars and Dragoons charge the French chasseurs, while artillery fired onto the French dragoon regiments. 
Off in the distance is Minutilly's Brigade of Austrian cavalry, the Hussars were able to chase away the French Hussars, but French artillery fire and a couple of failed charges ended the brigade’s day. While it did not break, BG Minutilly could not rally his brigade and they sat out the rest of the battle. That said, all three French cavalry brigades were kept in place as they were too fragile to risk charging. 
Bavarian light battalion off in the distance harried the Beauvoir Farm defenders.
The three German battalions of BG Volkmann’s brigade attacked the French repeatedly but could not break them. One battalion attempted to take the farm, but after a couple of rounds of combat were thrown back. BG Volkmann was soon shot dead as he tried to rally his men for a second go at the farm.

The Bavarians, who assaulted the French left, were more successful and eventually broke GdB Joubert outnumbered infantry brigade. This was punctuated by the charge of the 2nd Chevaulegeres, whose couple hundred cavalrymen were able to rout two French battalions in a matter of minutes! The day looked lost for the French, except that … 
Four battalions Young Guard of GdD Decouz 2nd Voltigeur division arrived to stem the French right and then proceeded to push the Austrians off the hill, breaking Volkmann’s brigade! 
The Bavarians hotly engaged the Young Guard to their front and succeeded in stopping the two battalions but at a high cost, GdB Prinz Karl small brigade of infantry had already broke and both of the remaining two brigades were moments from breaking ... and then both sides commanders called for a general retreat!
 
Aftermath
Overall it was an excellent game with a nice ebb flow for both sides. It was at the end of the day a minor French victory, as they did hold the farm.

The couple of objective scenario special rules I added work so, so. I have to rethink the French cavalry reserve rule as it really made no sense for the French not to immediately bring on GdD l'Heritier dragoon division. But I thought the bonus break point for holding the farm work well.

Ken will be running his Waterloo scenario again next month, with a few changes made from the first time we ran it at Drumbeat.

Tuesday, May 19, 2015

Battlegroup 28mm WWII


We had another game of Battlegroup last Saturday … Each side had a reinforced company from the Fall of the Reich supplement. Steve commanded the Russian Mechanized force and Bailey commanded the German Kampfgruppe (I commanded the store … so I was only able to rules mediate for most of the afternoon).
It is hard to see but the SU-85 in the middle of a ridgeline.
 
The game started with both sides recon forces on the table, but it was not long before the first wave of reinforcement troops arrived (each side rolled very well on turn 2). The German forces pushed into the center and up the right flank, while the Russian force mirrored them on the other flank.


It was going well for the Russians as they quickly knocked out a Marder III and Jagd Panzer IV, plus another section of troops were able to move up the German left flank and capture an objective. At this time they held three of the four objectives. They had a good base of fire on the right flank and overwhelming troops on the left. It started going bad when a lend lease Sherman blew up from a mine strike though.

Then it went from bad to critical when the Tiger showed up! It proceeded to drive into the open area, disregarding all enemy tanks. It was hit six times but none of the hits failed to do any damage to it. Of course it put an end to the fire, by brewing up three Russian tanks in rapid succession!
Both sides placed their FO’s in the center of the lines and proceeded to call down mortar and artillery barrages onto the table. The German FO tried several times unsuccessfully to get the division big guns to fire. The artillery fire on both sides really pinned down the action for several turns, but eventually the Germans began to push on both flanks, and moving into close combat range.

The casualties were extremely heavy for both sides, and it looked like the Russian would hold as a T-34 took out a half track and most of a German squad (who failed to hit with their Panzerfausts). But then a Panzerschreke team, which had been sneaking up the right flank woods, fired and brewed up the T-34.
 
This last exchange of fire was to much for the Russians and they retreated from the field.

Aftermath
This game we tried a couple of rules adjustments … as we play in 28mm we increased all measurements by 50%. I thought it worked really well for the most part, though the large open areas seemed more daunting to cross.
The second adjustment was to change most of the tables to formula’s. As an example, armor levels are listed as a Letter and you cross index the letter with the penetration number of the shot to get a “kill” number. If you convert the Armor Letter to a number you can find the Kill number by just subtracting the Pen value from the Armor value.
The only House Rule we used was to add a couple of maneuvers to vehicle movement, so that they did not move exactly like infantry. Namely they could turn, rotate or reverse in addition to moving forward. This worked ok, but do think I need to tweak it some more.

Friday, May 1, 2015

Napoleonic Hungarian Infantry

I have finished another battalion of Hungarian infantry for my Austrian army. I already had two battalions, so this one was to bring the brigade up to three battalions, like my other German brigade of three battalions.

I don't have a standard yet for the battalion. But I am going to use a high priced cloth flag, and currently waiting for it to arrive. Though pricy, the samples I have seen are very nice!

The figures are Perry Miniatures and as usual are extremely well sculpted and casted. I really like painting perry figures and choose them if possible.

The only downside with this particular code was that half the figures muskets were down, so I had to go back and make sure those figures were in the front rank. However, this meant that when the battalion is in Attack Column (shown above) the bayonets poked into the back of the front rank stands, which is a minor inconvenience.

I have already started my next project, Austrian Cuirassiers from Perry Miniatures. I think these should be easy to paint up and have set a goal to finish them before our next game in three weeks.

I am kind of in a “1813-14” mood for nappy’s, so have lined up several more Austrian units, a couple of Cuirassier regiments, a Genz battalion and 2-3 Landwehr battalions. I will have do up a few more leader stands and might throw in a 12lb battery.

Wednesday, March 25, 2015

28mm Elite Miniatures Napoleonic Spanish Cavalry

Today I finished the Spanish cavalry unit for Black Powder … they turned out alright, a little too heavy on the dip, so they do have a very dirty appearance. The figures weren’t that bad to paint up and for the most part I liked painting the Elite Miniature cavalry figures.

The main problem with the figures came up when I was basing the unit. I realized quickly that the posing of the figure, in particular the sword arm being posed down, was a going to be a problem.


Generally three cavalry figures to a base is already a tight fit, the arm pose increased the “width” of the figure by about 15% which meant that I would not be able to fit them in a line but had to stagger them. Even then the figures do not really “fit” as those swords would be cutting up their neighbors’ horse! I am hopeful that no other cavalry figures have that issue.

I am done painting Spanish for a while, and so next up is a unit of Hungarian infantry for my Austrian army. These are Perry figures, so expect to paint them up quickly.

Saturday, March 21, 2015

On the Road to Denain - July 1712

We had another game of Beneath the Lily Banner last Saturday. This was our first “big” game, in that there were six gamers and one moderator (me). Some people  had a good time, some didn’t … kind of what you expect for the first play through with multiple people at the table.
The forces arrayed for battle, Dutch far side, French near side.
(Dutch commanders from left to right, Bob, Pat & Mike)
Each side had fourteen battalions of infantry, four squadrons of cavalry and three batteries. In hind sight I should have cut out a battery and at least three battalions of infantry per side. The French commander was rolled as a gifted leader, and was commanded by Troy, with Wes and John acting as sub commanders. While the Dutch commander, played by Bob, was rolled as competent; Mike and Pat acted as sub-commanders.
English in Dutch service from Bob’s collections (top), with columns of French infantry from Troy’s collection (bottom).
The French battalions advanced all along the front (they almost always had 100% orders), while the Dutch commanders kept the right flank stationary and attacked with the troops on the left .
A few Spanish battalions showed up to help the Dutch out!

The Dutch are making some headway, but the woods anchoring the French right, made it difficult for the Dutch cavalry to turn the flank.
The French had closed the distance and firing commenced all along the center of both armies.
An overhead shot near the end of the game, you can see on the left that the French cavalry is in the process of smashing the English horse.

Overall the game went as well as can be expected considering that most of the players had never played BLB2. As is the norm, there were a couple of game questions that the rules could not answer. But I am still very keen on the rules and look forward to running another game next month.

Friday, February 27, 2015

Napoleonic Spanish Militia

I have finished my battalion of provincial militia my Spanish contingent (still deciding on a flag, but will most likely go with the standard red X cross). As you may have read these are in fact figures from the Perry Carlist wars range.


Just enough red showing to add a little color to the unit.
 
 
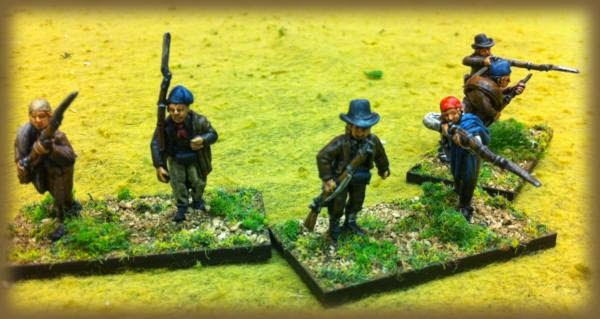
 You’ll notice a priest is accompany the battalion … which fits in well with the militia theme.
 
I had some figures left over, so made up a skirmishing unit of Spanish guerillas.

And finally what Spanish army would be complete without a tiny unit of armed Monks!

Next up is a unit of Spanish cavalry … after which I may take a break from the Spanish. I’ll either work more on my Austrian contingent or get sucked into the Wars of the Spanish Succession that is sweeping the store!

Saturday, February 14, 2015

Beneath the Lily Banner
Game Two

Bob and I had our second game of Beneath the Lily Banners this week. It was a slightly smaller game, in that we cut out a couple of infantry battalions as we wanted to focus on cavalry actions this game.

We each had four battalions of infantry, two squadrons of cavalry and an field battery ... again the British were Platoon fire for infantry and Blade for cavalry. While the French were Rank firing and Bullet cavalry. All units were classed as Drilled as well. Both Commanders were rolled as Competent.
 

The Battle
The start of the battle saw about half of each side advancing ... under the cover of long range artillery fire. The second turn saw our first cavalry clash (our last as it turns out!).
 
The bonus for being blade tipped the balance to the British cavalry who won the first round 5 to 3. We each reinforced the battle with a second squadron. Even so, as both sides were disordered, we each only rolled a couple of dice. 
 
The British still won, 2 to 1. This brought up a few issues (aka problems!) as the casualties inflicted eliminated the French squadron. With much reading we moved on through it, which resulted in the British squadrons overrunning the other French Squadron.
 
Bob now set out to send his infantry forward, ... that was the plan, but he had several bad turns for orders, so only a couple battalions of infantry advanced.

The sluggish nature of the advanace allowed the French Artillery to pour fire onto a lead battalion, eventually reducing it to half strength and shakey morale. By then though we each had two battalions of infantry blazing away with musketry.
The British cavalry had reformed and charged into a fresh French battalion, who issued their opening volley onto the foolish cavalry ... one hit was inflicted.  I though that was the end of infantry, but in the combat they managed to draw with the horse 3-3. Now reduced the horse only rolled one die, while the infantry rolled two ... and won 2-1! With the British Horse eliminated we decided to call the game.

After Action Report
While we still had a good time with the game, we did run into several issues/problems. While I do still like the morale checks we have to make, they did not seem to impact the game much. We must have taken over twenty five checks for various reasons ... and only had one unit become Shaken! Basically you need a 4+ to pass and it is real easy (especially in a small game) to get positive modifiers. The thing with casualties' is that they don't kick in until the unit is really starting to get beat up, so I suspect most units will simple be destroyed before they ever Rout.

The other issue that came up was with multiple units in close combat. There is some vague wording about it. the first is what happens to the reinforcing unit if the primary unit is destroyed? It implies that it is treated as a Lost Combat, but is that for the round or the whole combat? ie does it just take a morale check as normal or does it rout. Also what happens to the reinforcing unit if the primary unit is wipe out AND lost a number of combat rounds to auto Rout? Also are casualties spread upon all units or just the primary unit?
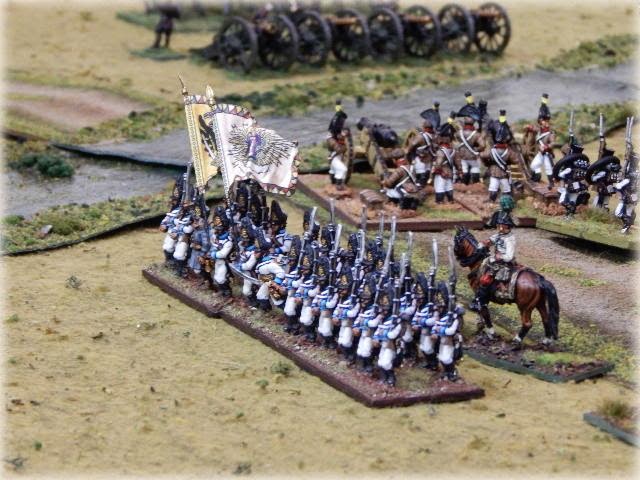
We also found that Cavalry is very brittle ... basically they have one good charge in them.

I am really keen to try a game with a scenario and multiple people ... While I know it will bring up other issue we will have to work through, it will be more entertaining to have a reason to attack/defend then just to "test out" game mechanics. :)

Thursday, February 12, 2015

Napoleonic Spanish Infantry

Finished my third battalion of Spanish infantry for Black Powder. Overall they came out as expected ... not great, but not bad.
I just realized I missed the buttons!

I need to touch up the flags, edge the sides black, as well as the bullet holes.

Grenadiers bearskin bag came out pretty well ... I like the light blue in it.
 
 
I am working on a fourth battalion, a militia battalion. Had some issue finding figures, until Mark suggested I look at the Perry Carlist figures ... only about 20 years off, but militia is militia!
My little workstation at the shop.

About 50% done ... might cut down on the red.
To left you'll notice some armed monks/priests,
I thought one or two would be a good fit with a Spanish militia unit :)


Monday, February 2, 2015

Austerlitz to Waterloo - 28mm Napoleonics

We played a Napoleonic rule set called Austerlitz to Waterloo last weekend. The rules are a home brewed set created by Wes R. Even though he has doubled the number pages of rules, from two to four, they are very easy to play and get into the game. They are geared toward 28mm, but really any scale of figures would work.


The scenario involved an Austrian force assaulting the French who were holding a line of villages behind a wooded stream. The Austrians needed to take three of the five objectives (bridge, two fords, & two towns) or just break French units to win.
 
Mark S. commanded two brigades of cavalry supported by infantry and a battery of light guns. He had the task of capturing the French right village and ford. James M. had the bulk of the Austrian infantry supported by two batteries, one light and one medium. The main attack would come from his troops and was focused on the right center of the French line.

 
Wes R. commanded several battalions of infantry supported by a battery and cavalry regiment. He was to hold the center and left flank of the French line. I commanded three battalions of infantry (one an elite Light battalion), three cavalry regiments (Hussars, Dragoons & Cuirassiers) as well as a medium battery. I was to hold the right flank, made easier by a large wooded area.

 
The Austrian attack against the right center took a bit of time to get going as they were slow to shake out of their march columns. It did not help that long range French artillery fire played havoc on the Austrians. It was at first looking like the Austrians were really going to have tuff day crossing the stream.

 
Mark’s command of cavalry quickly advanced up and over the hill, and I realized I needed to buy as much time as I could so sent in my cavalry piecemeal against his massed cavalry. Over the next few turns the cavalry from both sides clashed in the open area before the small village that held the French Light Battalion. Eventually the Austrian numbers won out, and all three regiments of French cavalry were broken. I was however, able to set up my foot battery in a good firing position and promptly blasted the worn out Austrian Cuirassiers from the battlefield!

 
In addition, I had during this time also moved a battalion of infantry through some woods and they engaged the Grenz battalion at the other end. After a turn of dismal firing by both sides, I charged home and drove the grenzers from the woods with the bayonet. This effectively ended the Austrian attack on our right flank, and I felt secure in my position to send off a battalion of infantry to help out in the center.

 
It seems that the Austrians finally sorted themselves out … under the cover of two artillery batteries! They then proceeded to advance with a couple of the large infantry battalions and pushed out all three defending French battalions. On their right, the artillery had swept away most resistance, and to secure the ford, another battalion of Austrian infantry crossed the creek and cleared away the remaining French forces. With the center and left broken, the remaining French forces retreated from the battlefield.

 
Overall the AtoW rules were fun to play and easy to master. After the game, we had a rehash session of the game. The result of which has Wes thinking of toning down the artillery fire, especially long range. In addition he might tweak the cavalry melee, as they were very destructive in a short time frame (four of the seven regiments were destroyed in one round of combat).