Showing posts with label Black Powder Battles. Show all posts

Monday, March 6, 2017

Battle of Halle 1815

Over the weekend our group fought out a what if scenario I had designed to use Ken's extensive collection of Waterloo troops. We used the Black Powder rules by Warlord Games as it was the easiest set of rules to get back into gaming Napoleonic's. Attending the game was Mike (Dutch), Myself (British) and Ken (Hanoverian) on the Allied side, while Chris (14th Division) and Mark (12th Division & Cavalry) commanded the French.

The basic premise of the scenario is that Hill's II corps situated around the Belgian city of Halle had been ordered to march to and join Wellington with the main army. Hill had been covering the Allied lines of communications in case Napoleon tried to send troops to severe that link, and in this case he did just that. Napoleon has sent Marshall Gérards VI corps to cut off and turn the allied flank. Both corps had some difficulty traveling along the country roads and bumped into each other around the small hamlet of De Boukendael.
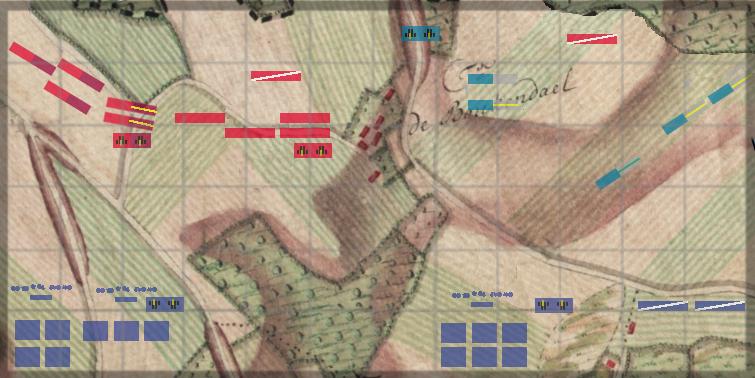


General Hills allied force comprised of Lyon's 6th Hanoverian Brigade, Johnstone's 6th British Brigade, d'Hauw 1st Netherlands Brigade and two Hussars regiments from the Hanoverian Cavalry Brigade.
British Infantry near the hamlet, Hanoverians off in the distance holding the right.
VI corps fielded both brigades of Bourmont 14th Division and one brigade from Pécheux 12th Division.  Berruyer 2nd cavalry Brigade from 7th Cavalry Division also supported the attack on the right flank.
GdB Toussaint 2nd Brigade, one battalion not seen as it is moving through the woods.
The French were attacking and started off with a general advance. Only one brigade was late off the start line, but they too were soon moving towards the Dutch (we had no blunders during the game, a first I believe!). From left to right, columns of French infantry advanced with skirmishers out front trying to disrupt the allied battle line.
The six battalions of the 30th and 96th Ligne regiments from GdB Rome's brigade.
They attacked on the French right. 
On the Allied right, the Hanoverian Brigade bore the brunt of the initial attacks but held fast against the onslaught of French Battalions. Remarkable even the landwehr battalions did not break from the initial stress of the French attacks.
The guns of the Hanoverian battery were not able to engage the fast approaching French columns with much effect. 

The French battalions of GdB Mazarny 1st Brigade attacking.

Two field battalions from Major-General Lyons 6th Hanoverian Brigade.

The French attack against the Dutch battalions holding the shallow ridge slowed once they reached the top and discovered several more infantry battalions, as well as cavalry and artillery supporting the forward infantry battalions.

A charge by Verden's Hanoverian hussars was thrown back by counter charging French Hussars, who carried on into the Dutch militia battalions. Fortunately they formed a disordered square and the hussars retired to their own lines after inflicting numerous casualties on the square, though unable to break it. 
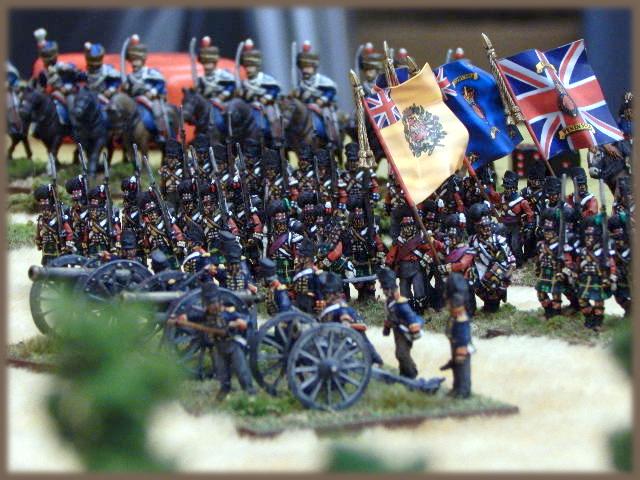
British 9lbs fire on the French infantry lining a small woods.
The British in the center had been relatively idle initially just exchanging artillery fire with a French battalion formed upon the edge of a small woods. So to relieve the pressure on the Dutch, two battalions of British infantry (one the 91st Highlanders) moved to support the Dutch by advancing on the French columns. They then spent the rest of the battle exchanging close range musketry with french skirmishers.

The battalion supporting the 91st late in the battle reformed to face to its right and engaged the French battalion which had been poorly engaged by British 9lbs. However this extra weight of fire soon drove the frenchmen out of the woods.
91st Highlanders face off against French skirmishers from a battalion of the 30th Ligne
By now the battle on the French left versus the Hanoverians was coming to a head. The lead battalion of the 9th Legere broke and then the rest of Mazarny brigade began to retire from the field. Though Mazarny was able to send forward his last fresh battalion to cover the retreat ... this of course broke the hanoverians!

1st battalion / 44th Ligne - The Rock of De Boukendail 
A battalion from Toussaint 2nd Brigade had pushed ahead of the rest of the brigade. They charged the Hanoverian battery and routed the gunners, then were counter charged by a german field battalion but held and then broke the germans. Before they could reorganize they were charged by a British Battalion (2/54th) but even though the British surge into them several times, they held on before forcing the 54th to retire! They only quite the field after the rest of the brigade was broken.

This brought an end to the battle in an Allied victory, though just. The Dutch were only holding on by miraculous efforts of its junior officers (ie Mike kept rolling 6's for his morale saves!). Though as noted above the unit of the game has to go to chris French battalion, it passed seven breaks test, most them at -2 or more during the game!

While not my best scenario, it is was pretty good and balanced overall; I believe everyone had a really good time and that is the main point of these games. Not sure when we'll next do a game, but think it will be in the 1813 Leipzig area with Prussians, Russians and French.


Wednesday, August 5, 2015

Battle of Arroyos dos Molinos

In October 1811, word reached General Hill, the commander of the British forces in the vicinity of Badajoz, that a French force under the command of General Girard was on the move in western Estremadura.
 
General Hill combined his forces with the local Spanish forces and together they began a pursuit of Girard on the 22nd of October. On the 27th, Girard marched only twelve miles, stopping for the night in Arroyo dos Molinos. The Allies marched 28 miles that day and were within five miles of the town. At two o'clock in the morning of the 28th, Hills force silently moved on to the plain some few miles from Arroyo do Molinos, the stage was set …
 
Opening Shots
The battle started slowly for both sides, the French infantry attempted to form into a coherent battle line though only 2nd battalion of the 40th Regiment headed the urgent orders and it advanced to the right of the 1st battalion. The chasseur regiment (the 27th) also moved out and maneuvered to the far right flank.
General Girard attempts to get his forces organized.

My old collection of French Infantry (Old Glory circa 2000) 

The allied start was not any better, only the cavalry brigade, less one dragoon regiment, advanced toward the French. With this temporary respite, the French managed to get most of their battalions of infantry formed up. crucially, the 40th regiment was able to face all three battalion towards the allied attack.
The 13th Light Dragoons and 2nd KGL Hussars advance toward the French.

The 10th Hussars faltered when ordered to charge the British cavalry, leaving them exposed in the middle of the battlefield. As we'll see, this hesitancy was temporary.
The 10th Hussars approach Long's Cavalry Brigade (British Cavalry is Ken's Perry Miniatures painted by Rex)

General Hill had wanted to block the French from leaving Arroyos and so ordered Gen. Wilson's brigade on a wide flanking maneuver. Unsure of the whereabouts of the other French brigade, General Wilson dispatched the 6th Cacadores Battalion to scout after the brigade.
Mark's newly painted British Infantry on the advance (Front Rank Miniatures - Reinforcement Packs) 

The remaining five battalions of Wilson brigade had successfully maneuvered into position but before Wilson could launch his battalions onto the French flank, an aid informed him of a large force of infantry moving to his rear.
Could they be the Spanish reserves or the French brigade doubling back? Not sure, Gen. Wilson wisely turns the two battalions of the 18th Portuguese Regiment to face the approaching force.
Mark also broughtt all the Portuguese units, most are metal Victrix figures.

The three British battalions of Wilsons brigade (28th Foot, 34th Foot & 39th Foot) were then ordered to charge. The 2nd battalion of the 40th Line Regiment took the brunt of the attack, though due to the presence of allied cavalry, had already formed square, so were not flanked by this attack. However, the French square lacked the firepower to fend off the British line, and though it held out longer than anticipated, broke before it could be reinforced.
Pivotal Moment
Seeing the unsupported Hussars, the British 9th Light Dragoons charged the 10th. However, in the ensuing combat it was the 10th that out fought the British dragoons and forced them to flee. The 10th follows up the fleeing Dragoons and routs them from the battlefield! Though they have blown horses, and are very far behind enemy lines, the 10th is rearing for more fighting, so wheels about to flank the Portuguese battery.
 
While this was transpiring, on the far right, the French 27th Chasseurs had charged the 50th Foot, who inexplicably failed to form square even though they were very aware of the approaching cavalrymen. While they inflicted severe casualties on the chasseurs, it was not enough to break their momentum and the 50th broke. The routing Englishmen swept up a battalion of the Portuguese 6th Regiment as well. The victorious but beaten up Chasseurs then retired to the rear.
 
The large force turned out to be the other brigade of Girard's force returning to the field of battle. They were screened by the 6th Cacadores Battalion, but this battalion barely slowed down the 3,500 advancing Frenchmen.
Pete and Aaron (new BP players) ran the six battalions of Remond's brigade
(Ken supplied all the figures which are Perry Miniatures painted by Rex Blackwell)


While the Portuguese kept the French at bay, the rest of Wilson's brigade pressed on, but were stopped at the outskirts of Arroyos as several battalions of the 34th regiment had finally moved up to support the hard pressed French left flank.
Outnumbered two to one, the Portuguese battalions valiantly tried to hold off the French assault. But there were too many French battalions and they pushed the Portuguese onto the backs of the British battalions.

Endgame
Making matters worse, the French 10th Hussar now charged the Portuguese battery, which failed to face the Frenchmen and were easily wiped out. The momentum of the charge took them into the flank of the 92nd Highlander Regiment, who also failed to form square and broke from the flank attack.

The arrival of Mirillo's Spanish division gave the allies a glimmer of hope, but this was soon dashed when the French Dragoons swept away the Spanish Cavalry regiments! General Hill knew the day was totally lost and ordered Wilson to extract his command from the tightening noose around it.
My Spanish arrive and do nothing! (models are Elite Miniatures)

Final Thoughts
I really liked the scenario though really can tell if it was balanced or challenging for both sides, as Ken had some of the worst luck rolling dice we have ever seen!

The game brought up the fact that I do not have any French Dragoons, which prompted me to move them to the top of my painting list. In addition, I am now keen on painting up a battalion of Highlanders. I still have one more Austrian Cuirassier to finish and I think our next game will be an 1813 affair, but not totally sure yet.

Monday, June 22, 2015

Battle of Waterloo, June 18th 1815

To celebrate the 200th anniversary of the battle of Waterloo, we again ran Ken’s scenario last weekend. It was a pretty good game ... for the Allies, the French side had horrible die rolling at all the wrong times!

I tweaked the scenario for this 2nd run of the game, as we were playing at the store on a smaller table, I had no choice but to crop the battlefield. I also learned some lessons from the first time we ran the scenario in January. I chopped the map down by two feet to fit our max table size, and in addition squeezed the map even more to allow for some room to maneuver on both sides of La Haye Saint. I also changed up the area around Papalotte by putting more forest around it and moving it towards the Hanoverian Line.
For the special scenario rules, I eliminated all the special Divisional Columns rules as they just caused all sorts of headaches and did not add anything to the game play. I also restricted the movement of the two British brigades and the detachment of rifles for a couple of turns (worked well). Streamlined the reinforcements (though most did not come on) and tweaked the victory conditions. I really liked the way the Prussians are Coming rule mechanic worked. It was effectively a timer on the French attack.

The Battle

Right away the game did not bode well for the French, as they failed to move two of their five leading brigades and third brigade decided to march to the right instead of forward!
 
The 5th Militia watches from atop the ridge as the French 2nd division slams into the rest of the Dutch brigade. Sadly for the French, the Dutch held up very well to the assault, and so the 5th was not even needed. That said, this brigade suffered the brunt of the French attack and broke just before the French army retired from the field of battle.

 
A 4 gun section of a Dutch horse battery survived the fire from the French grand battery. It proceeded to fire ball and shell into the approaching battalions from GdB Aulard 2nd Brigade of 2nd Division.

 
The first attack on La Haye Saint has already failed from the south, but a lone unsupported French battalion vainly attempts to drive out the Germans from the 2nd KGL light battalion from the West.
 
GdB Bourgeois would send a battalion from the 28th Regiment to drive out the company of 95th Riflemen holding the sandpit, while the other three battalions of his brigade attacks (unsuccessfully) La Haye Saint from the East.


GdB Nogues four battalion of 1st Brigade, 3rd Division, finally get moving toward the enemy, as they try and support the battalions from GdB Pegot brigade of 4th division who are already engaging the Nassau regiments.
 
The Nassau battalions from 2nd Regiment hold off the attack for most of the day, but eventually the French numbers tell and they break. But not before a couple of Hanoverain battalions move onto the ridge and two of the regiments of Hussars from MG Vivian’s 6th Cavalry Brigade charge the French battalions forcing them into squares.

The fire from Ross’s heavy 9lb battery were instrumental in driving off the battalions of GdD Donzelot’s 2nd Division.
 
Bailey, who commanded the British right, double checks his victory conditions, “hold ridgeline … check.” It was a Stunning Victory for the allies as the French were not able to capture either objective during the game.

 
Aftermath
Even with the changes, the French were once again handily defeated. We did not even get a chance to see what the cavalry reserves for both sides could do, as the French never really got close to Objective A (ridgeline). But honestly both French commanders (Steve and Mark) had some of the worst die rolling by a side I have seen, even when Mark rolled above average I would hot dice him! So I am reluctance to change anything until we have another go and see if the dice were the main issue.

Though it could be a while before we do another game, we were talking about shifting our focus to 1813 and doing up some scenarios from the Battle of Leipzig.

Monday, May 25, 2015

Battle of La Rothier February 1814

We had a great game of Black Powder last Saturday. Bill, Bob, Gary, Steve and I fought out the 1814 scenario I had created and here is the background on it:

Northern section of the battle where Grand Duke von Wrede Austro-Bavarian V Corps attacked Napoleon's flank at La Rothiere. Marmont's weak corps attempted to cover the front between Chaumesnil and Morvilliers.

The scenario was a “what if” Marmont did not fallback and held on to Chaumesnil. This set up having the Young Guard attack V corps around Beauvoir Farm instead retaking Chaumesnil.

Marmont's French Corps

Commanded by Bob
Infantry Division - GdD Lagrange [Ld7]
Brigade – GdB Joubert [Ld7]
  8x Small Infantry Bns 

Commanded By Bill
Cavalry Division - GdD Doumerc [Ld7]
  1x Hussar & 3 small Chasseurs Rgts &
  2x 6lb Batteries

Cavalry Division - GdD l'Heritier [Ld7]
Brigade - GdB Lamotte [Ld7]
  3x small Dragoon Rgts

Brigade - GdB Collaert [Ld8]
 2x Small Dragoon Rgts 

Commanded By Gary
2nd Voltigeur Division - GdD Decouz [Ld9]
  4x Young Guard Bns, 2x 6lb Batteries


Austrian-Bavarian V Corps

Commanded By Steve

Bavarian Infantry Division - GdD Rechberg [Ld8]
2x 6lb batteries

Brigade GdB Bayern [Ld7]
  3x small Chevaulegeres rgts

Brigade GdB Prinz Karl [Ld7]
  1x light, 1x infantry & 1x militia Bn

Brigade GdB Maillot [Ld7]
  1x light, 2x infantry & 2x militia Bns 

Commanded By John
Austrian Division - FL Splenyi [Ld7]
Brigade Volkmannn [Ld7]
  6x infantry Bns & 1x 6lb Battery

Brigade Minutilly [Ld8]
  1x hussar, 1x dragoon rgts & 1x 6lb battery

GdD Lagrange and GdD Doumerc troops began the battle on the table, while the rest of the units for both sides would move on to the battlefield throughout the game. See map above for various entry points for arriving troops.
The first couple of turns went as expected, four of the five allied brigades slowly moved onto the battlefield and a few rounds on long range cannon fire from the French ensued. 
Most of the Bavarian forced moved to the left, to assault the French battalions holding the hill. 
This meant that the Austrians were needed to take the farm, so the three battalions of the German regiment veered left and attacked uphill against the French holding the farm.
The three battalions of the Hungarian regiment and the cavalry brigade would hold off the massed French cavalry. The Hussars and Dragoons charge the French chasseurs, while artillery fired onto the French dragoon regiments. 
Off in the distance is Minutilly's Brigade of Austrian cavalry, the Hussars were able to chase away the French Hussars, but French artillery fire and a couple of failed charges ended the brigade’s day. While it did not break, BG Minutilly could not rally his brigade and they sat out the rest of the battle. That said, all three French cavalry brigades were kept in place as they were too fragile to risk charging. 
Bavarian light battalion off in the distance harried the Beauvoir Farm defenders.
The three German battalions of BG Volkmann’s brigade attacked the French repeatedly but could not break them. One battalion attempted to take the farm, but after a couple of rounds of combat were thrown back. BG Volkmann was soon shot dead as he tried to rally his men for a second go at the farm.

The Bavarians, who assaulted the French left, were more successful and eventually broke GdB Joubert outnumbered infantry brigade. This was punctuated by the charge of the 2nd Chevaulegeres, whose couple hundred cavalrymen were able to rout two French battalions in a matter of minutes! The day looked lost for the French, except that … 
Four battalions Young Guard of GdD Decouz 2nd Voltigeur division arrived to stem the French right and then proceeded to push the Austrians off the hill, breaking Volkmann’s brigade! 
The Bavarians hotly engaged the Young Guard to their front and succeeded in stopping the two battalions but at a high cost, GdB Prinz Karl small brigade of infantry had already broke and both of the remaining two brigades were moments from breaking ... and then both sides commanders called for a general retreat!
 
Aftermath
Overall it was an excellent game with a nice ebb flow for both sides. It was at the end of the day a minor French victory, as they did hold the farm.

The couple of objective scenario special rules I added work so, so. I have to rethink the French cavalry reserve rule as it really made no sense for the French not to immediately bring on GdD l'Heritier dragoon division. But I thought the bonus break point for holding the farm work well.

Ken will be running his Waterloo scenario again next month, with a few changes made from the first time we ran it at Drumbeat.

Friday, May 1, 2015

Napoleonic Hungarian Infantry

I have finished another battalion of Hungarian infantry for my Austrian army. I already had two battalions, so this one was to bring the brigade up to three battalions, like my other German brigade of three battalions.

I don't have a standard yet for the battalion. But I am going to use a high priced cloth flag, and currently waiting for it to arrive. Though pricy, the samples I have seen are very nice!

The figures are Perry Miniatures and as usual are extremely well sculpted and casted. I really like painting perry figures and choose them if possible.

The only downside with this particular code was that half the figures muskets were down, so I had to go back and make sure those figures were in the front rank. However, this meant that when the battalion is in Attack Column (shown above) the bayonets poked into the back of the front rank stands, which is a minor inconvenience.

I have already started my next project, Austrian Cuirassiers from Perry Miniatures. I think these should be easy to paint up and have set a goal to finish them before our next game in three weeks.

I am kind of in a “1813-14” mood for nappy’s, so have lined up several more Austrian units, a couple of Cuirassier regiments, a Genz battalion and 2-3 Landwehr battalions. I will have do up a few more leader stands and might throw in a 12lb battery.

Wednesday, March 25, 2015

28mm Elite Miniatures Napoleonic Spanish Cavalry

Today I finished the Spanish cavalry unit for Black Powder … they turned out alright, a little too heavy on the dip, so they do have a very dirty appearance. The figures weren’t that bad to paint up and for the most part I liked painting the Elite Miniature cavalry figures.

The main problem with the figures came up when I was basing the unit. I realized quickly that the posing of the figure, in particular the sword arm being posed down, was a going to be a problem.


Generally three cavalry figures to a base is already a tight fit, the arm pose increased the “width” of the figure by about 15% which meant that I would not be able to fit them in a line but had to stagger them. Even then the figures do not really “fit” as those swords would be cutting up their neighbors’ horse! I am hopeful that no other cavalry figures have that issue.

I am done painting Spanish for a while, and so next up is a unit of Hungarian infantry for my Austrian army. These are Perry figures, so expect to paint them up quickly.

Friday, February 27, 2015

Napoleonic Spanish Militia

I have finished my battalion of provincial militia my Spanish contingent (still deciding on a flag, but will most likely go with the standard red X cross). As you may have read these are in fact figures from the Perry Carlist wars range.


Just enough red showing to add a little color to the unit.
 
 
 You’ll notice a priest is accompany the battalion … which fits in well with the militia theme.
 
I had some figures left over, so made up a skirmishing unit of Spanish guerillas.

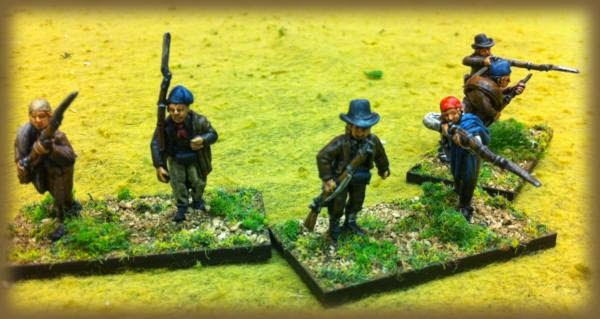
And finally what Spanish army would be complete without a tiny unit of armed Monks!

Next up is a unit of Spanish cavalry … after which I may take a break from the Spanish. I’ll either work more on my Austrian contingent or get sucked into the Wars of the Spanish Succession that is sweeping the store!